Abyssal Dark Forest
Abyssal Dark Forest will unlock after Dark Forest. It requires 1,000,000 trophies, 9,000 gear score, and 20 awakened Hunters. This mode is definitely a lot more difficult than
Dark Forest but you will at least be able to reuse some of your current Titan Gear. Depending which pieces you've already made from Dark Forest you may be in an ok spot to
start with Abyssal Dark Forest or you may have to build out some new sets. There is a lot of new information and I will attempt to cover it all here. There are 5 levels to
clear that get increasingly difficult as well as crystals to be broken that will affect the difficulty. Completing runs in this mode will give you your choice at scrap and
up to a 20% chance to get a schematic.
Gameplay
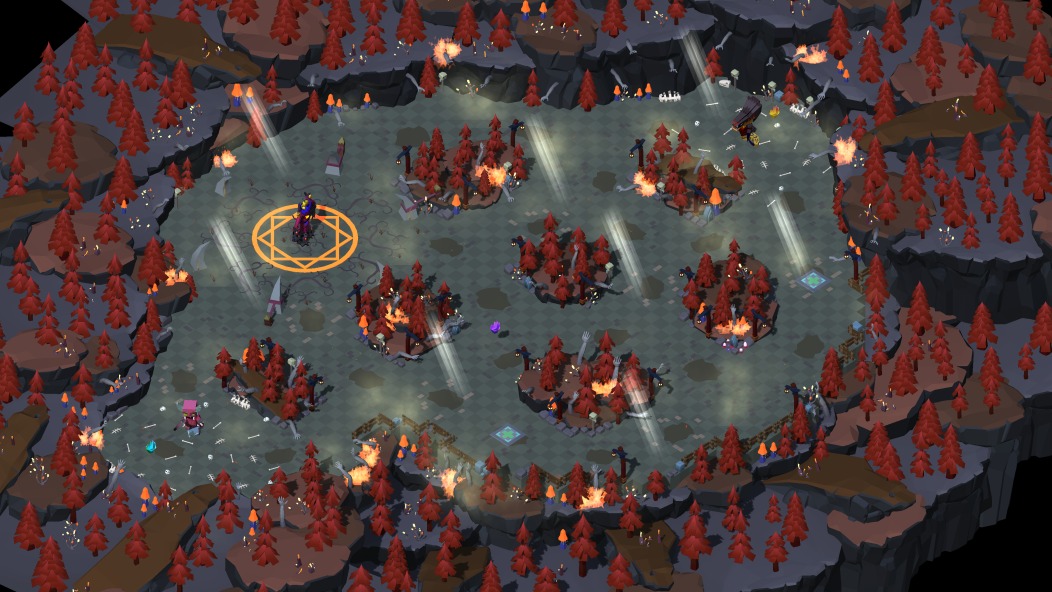
In Abyssal Dark Forest the map is very similar to Dark Forest but there are a few differences with the main one being there is no healing in this Dungeon from Purple Power
Stones. Any healing you get will have to come from Hunter Abilities like Life Steal or Regen. If a Hunter has Life Steal it is usually enough to select this as one of your
Permanent Abilities then you can still exclude it via awakening so you don't get more of them. There are also a few other Hunters that have abilities that grant you healing
that will also work. You will spawn on the East side of the map and the boss which is the Abyssal Treant is on the West side of the map. Again, there are three crystals.
Breaking the first one is required while breaking the additional two adds to the difficulty. The purple crystal is located in the middle of the map, yellow in the North
East, and blue in the South West. Each of these has a minimum damage required to be able to destroy the crystal; purple - 0, yellow - 1,500, and blue - 3,000. The North
East and South West crystals are protected by a mini boss which must be defeated before you can destroy the crystal. There are only 5 levels to this dungeon so a complete
run would be a c12 since there are no crystals on level 5.
For Hunter selection the players are offered 3 sets of 9 Hunters. You can pick whichever set you want but that set of Hunters will be used for the rest of your current run.
These sets will reset after you've completed a run (at least one level then quit out), the timer runs out, or after 20 minutes. If either of these are met your 3 sets will
refresh and give you a new Hunter selection.These 9 Hunters are populated from certain pools of Hunters. You will get 2 "S" rank Hunters, 6 "A" rank Hunters, and 1
Hunter from the leftovers that are not in either the "S" or "A" ranked pools.
S Rank Hunters
- A Girl and Her Golem
- Abyssorb
- Anubis
- Centipede
- Commander Vanellus
- Hoplite
- Leprechaun
- Mender
- Mimic
- Succubus
- Superhero
- Supervillain
- Torment
A Rank Hunters
- Ancient One
- Apex Predator
- Arachna
- Beetle
- Carnivorous
- Crow
- Efreet
- Engineer
- Eternal
- Firefluff
- Frozen Queen
- Gentleman
- Goblin Engineer
- Gray Wolf
- Houndmaster
- Huntalisk
- Lavamander
- Mech
- Mech Assassin
- Mummy
- Mutant Turtle
- Necromancer
- Ninja
- Phantom
- Plauge Doctor
- Raging Orc
- Samurai
- Shadow Witch
- Skull Master
- Sniper
- Snowman
- Spider Queen
- Stormstrider
- TikiTiki
- Time Traveler
- The Ripper
- Thor
- Trickster
- Void Knight
- Zeus
Gameplay Modifiers
Floor 1 always has the same modifiers but floors 2 to 5 are random. The modifiers are split up into different groups. Once the the modifiers are chosen from a group the
default modifier is swapped for the new altered one. The Groups are as follows:
Group 1: General (1 is chosen)
Group 2: Elemental (2 are chosen)
Group 3: Debuff (1 is chosen)
Group 4: Secondary (1 is chosen)
Boss Abilities
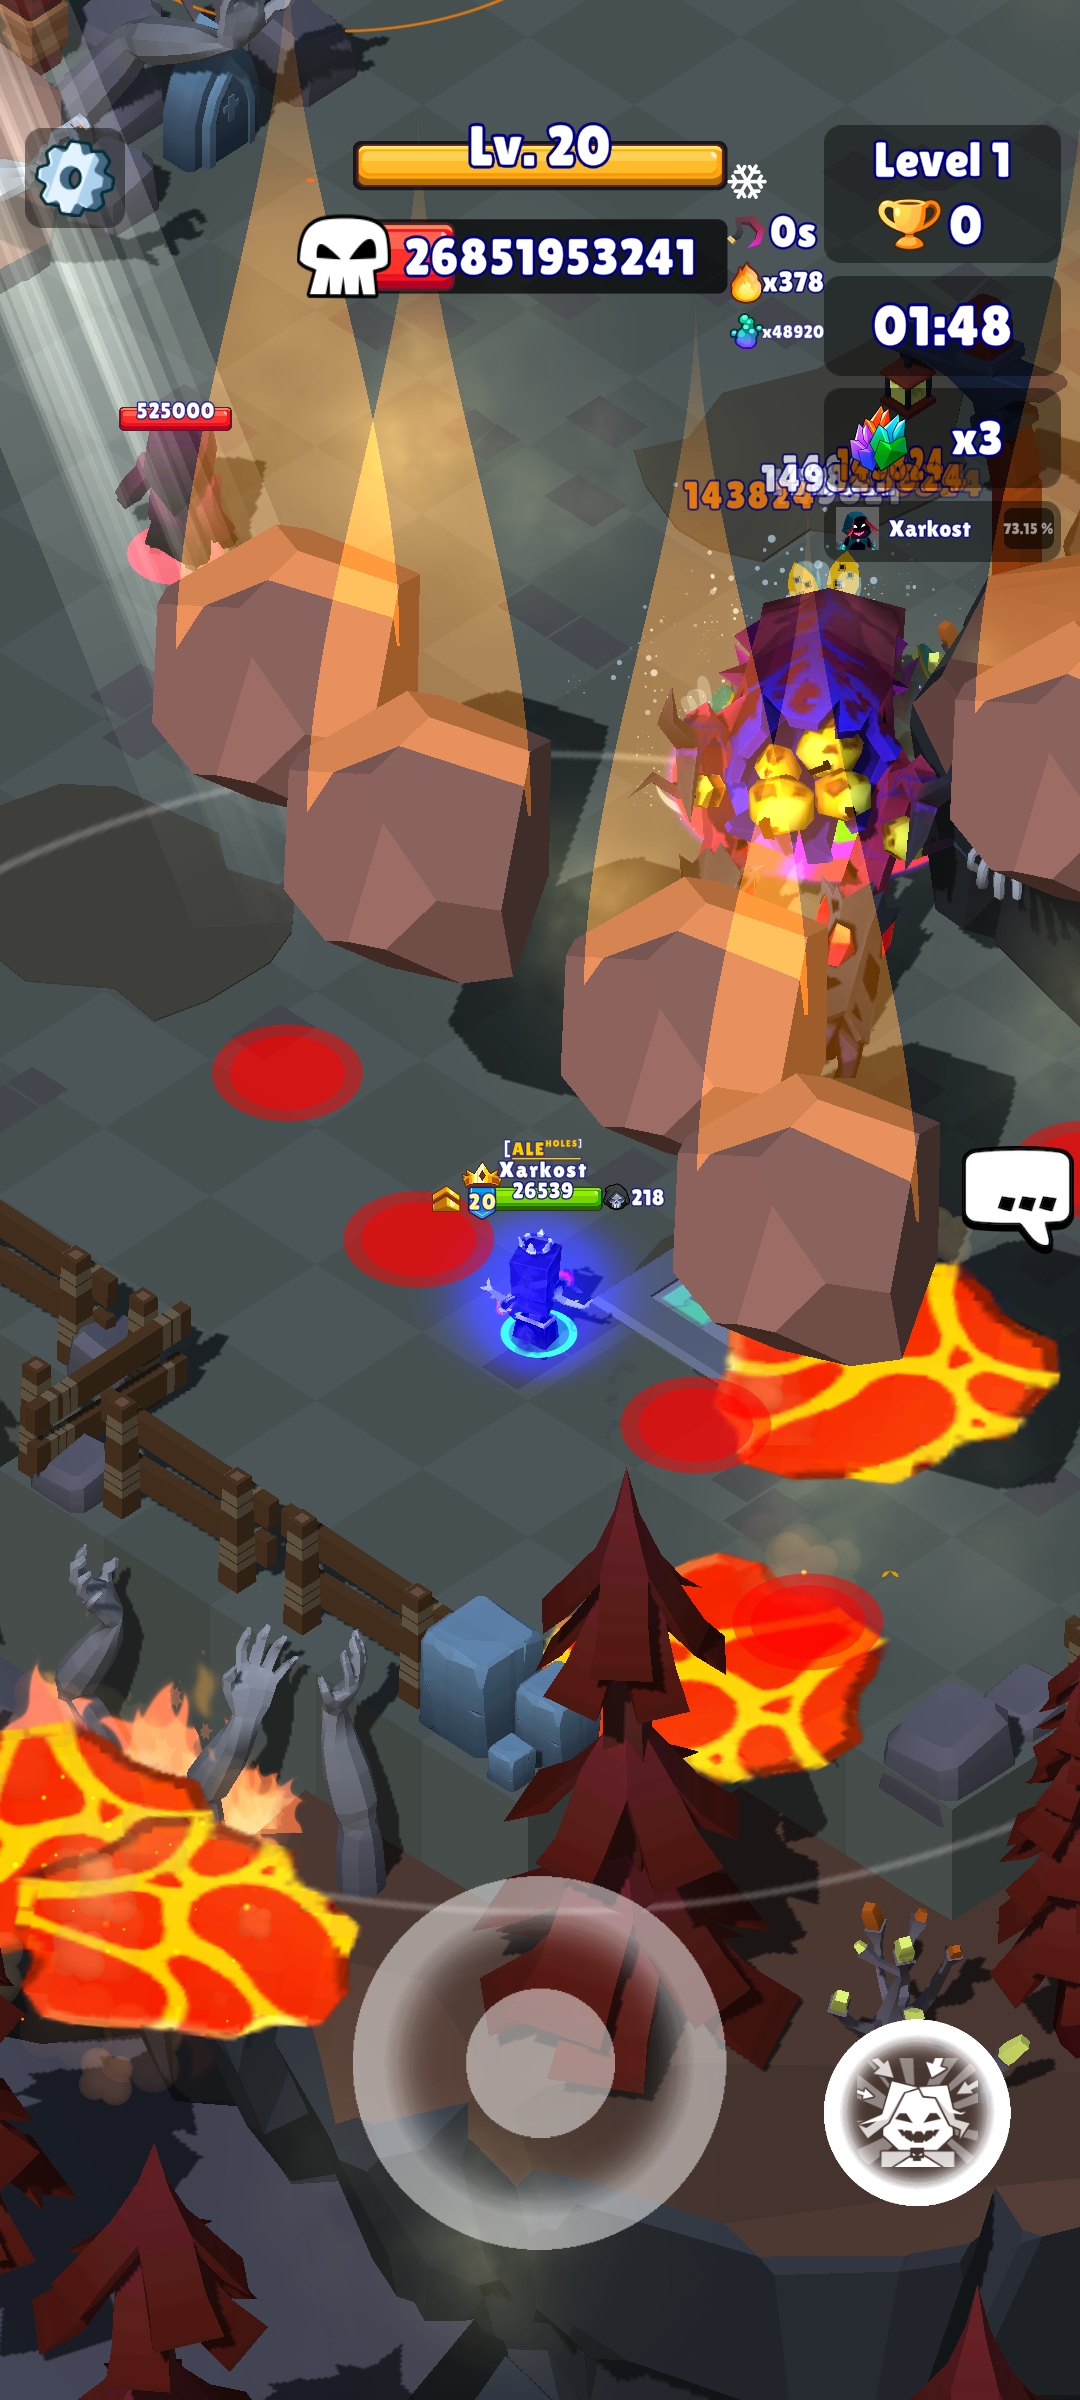
The Abyssal Treant has a few different attack patterns and abilities besides the standard attack. The first is a stun attach that covers three quarters of a circle. If you get hit
with this it will pull you into melee with the boss and stun you briefly. The only way to avoid this is to run behind the boss into the safe area. The second attack is a
full circle AoE around the boss. This attack has 4 waves. The first wave of this attack is a wave of roots that starts at the Abyssal Treant and goes to the edge of the
circle pushing you along the way. The next 3 waves of this attack function the same way except there is a safe spot by the Abyssal Treant that won't push you away and the
range of the attack gets a lot bigger. So you should aim to either stay outside the range of the first wave or get pushed by it then immediately run up closer to the Abyssal
Treant so you don't get hit by the subsequent waves. Also, the Abyssal Treant can summon a wave of monsters similar to regular Dark Forest
Abyssal Treant has an ability that appears similar to Dark Forest but it is quite different. When the shield appears the boss gains a damage reduction buff of 90%. Three
golems will spawn around the map and be connected to the boss with a beam of light. The golems don't attack or move. Each golems spawns with 200 health but they work the
same as the crystals where each hit can only deal 1 damage. The damage reduction will last for 30 seconds and it will decrease by 1.5% for each second passed. After 30
seconds have passed any golems remaining will despawn and the damage reduction buff will turn off. Each golem killed removes 15% of the buff and if all 3 golems are killed
the buff is removed completely.
The poison ability is easy to dodge. The Abyssal Treant will prepare to launch its poison attack. Avoid getting hit by these or walking through them after they land or you
will take damage. The poison pools will disappear after a few seconds.
This ability will have rocks fall from the sky that land and leave lava pools. Getting hit by the rocks or walking through the lava pools will damage you. This one is a
little more difficult to dodge than the poison attack only because the rocks are so large they take up more of your screen. Also, they will drop several times leaving
multiple sets of lava pools on the ground for you to avoid. The lava pools will disappear after a few seconds.
The last ability the Abyssal Treant has is when it reached 10% health it will surround itself in a red bubble and three totems will spawn. Each totem will have 666 health
and function the same as the crystals where each hit can only deal 1 damage. When the totems spawn the boss will be engulfed by a red aura which cleanses all stacks
currently affecting the boss, increases its attack speed, attack damage, and movement speed. Though while this aura is active the Abyssal Treant will also take additional
damage from all sources. For each totem destroyed, the buff will be cut by 33.3%; with the third totem completely removing the buff from the boss when destroyed. It is up
to you whether to leave the aura active. Leaving the aura active will allow you to deal more damage but it also makes the fight more difficult with all the buffs Abyssal
Treant receives to its damage output.
Strategy
Similar to Dark Forest it is difficult to give an exact strategy for Abyssal Dark Forest. It depends on where you are in the game, how many sets you have, which Titan gear
pieces you have and if you are able to get them ranked up. It is important swap all your Hunters to have the Life Steal or Regen Ability if it is an option as you've most
likely excluded it previously for most modes if your Hunter is awakened. As for Titan Gear Max Level is the most important as well as having multi shot. Depending on your
builds and gear it is also pretty common to use HP2D and Disease several builds. I am not saying these are the only viable options but they are the most common ones I've
seen when looking through different builds and discussing with others playing this mode. Also, communication is important. If you do have multiple sets you need to work with
your teammate to make sure you are supporting each other. Also, make sure to communicate Hunter picks so you don't both waste an S tier Hunter on the same level.
If possible I think it would be great to be able to have Max Level, Hp2D, and Multishot on your defensive pieces. This will allow you to use them across multiple sets. I
found my big breakthrough in Abyssal Dark Forest was when I was able to get these pieces and get them to rank 2. For my Max Level defensive piece I filled with Purple Power
Stones for additional experience, for my HP2D defensive peice I filled with Green Power Stones for the additional HP, and for my Multishot piece I used 2 Yellow and 2 Purple
and this was reused between my ADF and DF sets. Then in your offensive pieces you'll need to build 2 separate sets at least for damage. Pieces that can fill well here are
HP2D, Deathfest, or Additional Max Level pieces. If you are able to get a Rank 2 Max Level piece in your defensive sets that should be enough.
I built one offensive set around Poison, Earth, and Undead. I had 1 Green, 1 Earth, 1 Undead, and 5 Blue Powerstones. Not even all of them need to be level 7. For my Fire Set
I used 5 Red, 1 Undead, and 2 Blue Power Stones. Also, if possible I would recommend building a Support set with Disease, Weakness, Hex, etc. You can reuse other gear pieces
and what you have to deal damage doesn't matter as you will mostly be supporting with Disease being the most important.
Here is an image taken from the Hunt Royale discord of a post by a player Rikkity showing different options for offensive setups you should work towards building. They did
a great job visualizing this and it matched other info I came across while researching and discussing with my clan so figured I would use it here. The best way to get
these alternate builds setup is to get the Max Level and Multishot on your defensive pieces as these will be needed in most builds. You'll then be able to swap around the
alternate swords and rings to allow you to combine them to make different builds. I do find making this many pieces can cost a lot of resources though.
Beginner
You will still be running your same set from Dark Forest or maybe you are in the early stages of building out a new set to include Max Level. You won't get very far at this
point unless you have some good players to guide and carry you. The easiest set to build from an offensive perspective is just 1 green and 7 blue Power Stones. It is
reliable enough to get you started in this mode. You can most likely even solo the first one or two floors with your original Dark Forest set but it will take you a while
and you will have to use the S tier Hunters. If you are being caried by someone just make sure you communicate and pick the Hunter they want you to use to help them.
Intermediate
At this point you will hopefully have your Max Level set built as well as a few other pieces to combine into different builds to allow different damage types depending on
the boss resistances. Your Max Level pieces should be at level 10 and hopefully some of your other builds have the majority of the Titan Pieces maxed out. There is
also a good chance you've been able to rank up some of the Titan pieces you use in your builds.
Expert
If you've reached this stage you'll most likely have all the pieces you need for the different builds as well as these pieces enhanced to higher ranks.
Crystals
Your strategy may also change depending on how many crystals you break. At a minimum you can do a c4 run which you break the one crystal on each floor or a c12 run where
you break all three crystals on each floor. On each floor there are there are 3 modifiers that can be added if you break a crystal. Breaking c1 will apply one randomly,
c2 will apply two randomly. while breaking the c3 will apply all of the effects. The modifiers for each floor are:
- Increase boss hp
- Increase boss damage%
- Increase monsters damage, hp, movement speed, spawn rate, and spawn density on map, change some monsters to exploding
Also, a big difference with the Abyssal Dark Forest is that each crystal broken makes the rest of the run harder, not just floor 10. Each additional crystal broken besides
the one required on each floor with make the rest of the run 25% harder. For example, if you break the additional two optional crystals on floor 1 every other floor will be
approximately 50% harder.
Mini bosses
Leprechaun
Leprechaun will first throw a ring of attacks which will hit around him in almost a complete circle. He will use this attack every 10 seconds. If you run right at Leprechaun
you should be able to run underneath this attach and take no damage. If you don't kill Leprechaun before the 10 seconds is up he will use it again and if you are standing
still it will do a ton of damage especially if you haven't leveled up very much yet. Besides this attack he will just use Leprechaun's normal attack.
Reward: The "Lucky Xp" buff which will give you 1000% experience gain throughout the match.
Ripper
Uses The Ripper's attack pattern. Will throw a hook to pull you in if you are at range and will apply weakness. If you stand in melee Ripper will continue to melee you.
Reward: The "Weakness" debuff which will let you apply 50% weakness to enemies.
Protector
Attacks with the Protector's bubble which will slow you down and cause you to take additional damage. The first attack will be a large orange bubble. This attack is repeated
every 13~ seconds. Between this large orange bubble will be the small blue bubbles for its regular attack.
Reward: The "Yeti" debuff which will let you apply frozen to enemies and give you bonus damage against frozen target.
Wolf Shaman
Wolf Shaman attacks with a normal attack but also summons totems. There are two types of totems this mini boss can summon. The first applies frost to you which will slow
you down and cause you to take additional damage. The second will protect Wolf Shaman making your attacks only deal 1 damage until you destroy the totem or it expires.
Reward: the "Power of Elements" buff which gives you a healing aura and 500% earth damage.
Ninja
Uses ninja's skill. Each hit on the same target increases damage by 25% up to 700%. Resets when a new target is hit. Every 10 seconds throws an attack that ricochets to the
ally.
Reward: Ninja's stacking bonus damage
Huntalisk
Normal attack, applies poison. Every 10 seconds spits poison that is permanent if it hits you (until you die).
Reward: Both players get permanent poison + 500% poison damage
Grim Reaper
Every 10 seconds his attack has a 25% chance to death strike the player. Otherwise default attacks.
Reward: Death Strike and Death Touch (Deathfest)
Rewards, Scrap, Schematics and Mimic
The rewards in Abyssal Dark Forest are Scrap and a fairly high drop rate at Schematics. The rewards scale based on how many crystals you break. You can view the below image
from the Hunt Royale creators showing all rewards based on the amount of crystals broken. One thing to note is with the Scrap reward you can choose which type you want to
help you farm schematics for certain slots easier. Also, if you manage to break all 12 crystals you have a 20% chance to receive a schematic. Remember schematics can be
sold for 1,800 Dark Forest gems so it is possible to gain the gems playing this mode as well.
The other possible reward is the Hunter Mimic. This is a powerful Hunter that will require you to clear the 5th level of Abyssal Dark Forest with all crystals desroyed
500 times.This is going to take a long time to complete the requirements for but should get easier over time as you gain better equipment during your runs and gain
other buffs through changes within Hunt Royale.
Titan Gear